Step-by-Step Instructions for Installing Outdoor Pendant Lighting
Installing outdoor pendant lighting can seem intimidating, but it’s easier than you think when you’re prepared. The right pendant lights don’t just brighten up your space—they create a warm, inviting atmosphere for your porch, patio, or backyard. Plus, they’re a fantastic way to elevate your outdoor lighting project and make your home stand out.
Safety is key when you install outdoor lights, so always start by turning off the power and using the right tools for the job. Once you’ve got the basics down, you’ll see how rewarding it is to transform your outdoor space with just one fixture.
Key Takeaways
-
Turn off the power at the breaker to stay safe.
-
Gather tools like a voltage tester, screwdrivers, and ceiling box.
-
Pick weatherproof pendant lights that match your outdoor style.
-
Install step-by-step, secure the light, and check wires.
-
Check and clean outdoor lights often to keep them working well.
Preparation for Installing Outdoor Pendant Lighting
Safety Precautions to Follow
Safety comes first when starting your outdoor lighting project. Begin by switching off the power at the circuit breaker. This step stops electrical shocks and keeps you safe. Use a voltage tester to check that no electricity is flowing through the wires.
If you don’t know much about electrical work, look up local electrical rules. These rules help you follow the law and avoid dangers. Wear insulated gloves and safety goggles for extra protection.
Tip: Unsure about working with electrical wiring? Hire a licensed electrician. Staying safe is always the best choice!
Tools Required to Install a Pendant Light
Using the right tools makes installation easier. Here’s what you’ll need:
-
Screwdrivers (flathead and Phillips)
-
Voltage tester
-
Wire stripper
-
Drill with correct bits
-
Measuring tape
-
Ladder
Each tool has a job to do. For example, the wire stripper gets wires ready to connect, and the drill helps attach the ceiling box.
Materials Checklist for the Installation Process
Having all materials ready saves time and effort. Here’s your checklist:
|
Material |
Purpose |
|---|---|
|
Pendant light fixture |
The main piece of your lighting project |
|
Ceiling box |
Holds the fixture securely |
|
Electrical wires |
Links the light to the power source |
|
Wire connectors |
Keeps wiring safe and tight |
|
Mounting hardware |
Secures the fixture in place |
Check your list twice to ensure nothing is missing. Missing items can slow you down and make the job harder.
Choosing the Right Outdoor Pendant Light
Picking the best pendant light can change your outdoor space. The right light improves the look and works well for a long time. Here’s what to think about when choosing one.
Weather Resistance and Durability
Outdoor lights deal with tough weather daily, so they must last. Choose lights made from strong materials like coated steel, aluminum, or sturdy plastic. These materials resist rain, wind, and snow without damage.
Check the IP rating of the light. An IP rating of 44 or higher means it’s safe from water and dust. This helps the light last longer and work better outside.
Tip: Live in a place with bad weather? Pick a light made for tough conditions.
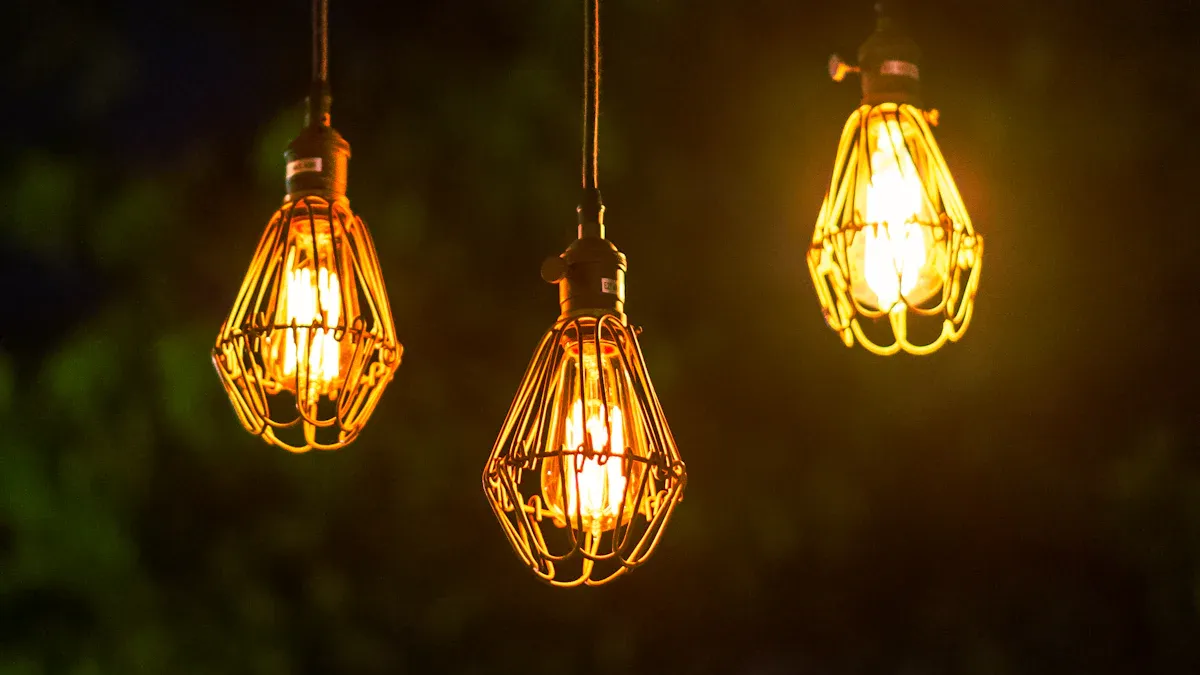
Matching Style with Outdoor Décor
Your pendant lights should match your outdoor style. Whether you like modern, rustic, or unique designs, there’s a light for you.
-
The Santorini light looks like Greek boat lanterns. It has glass diffusers and comes in mustard, grey, or white.
-
For a modern vibe, the Messina 0866 light has a black steel frame and warm glow.
-
Need something portable? The Balad lamp by Fermob is tough, easy to move, and comes in many colors.
Think about how the light looks during the day and at night. A good pendant light can be a stylish piece even when off.
Selecting the Right Size and Hanging Height
Size and height are important for pendant lights. A big light can feel too much, while a small one might not shine enough. Measure your space before buying.
Hang the light at least 7 feet above the ground. This keeps it out of the way but still brightens the area. Over tables or seats, leave 30-36 inches of space from the surface.
Pro Tip: Unsure about height? Adjustable lights let you change it easily or use them in different spots.
Step-by-Step Process of Installing a Pendant Light
Turning Off the Power Supply
Always turn off the power before starting. Go to your circuit breaker panel and switch off the breaker for the area you’ll work on. Flipping the light switch isn’t enough to stay safe.
Use a voltage tester to check if electricity is still flowing. This tool is easy to use and helps you stay safe. Follow Lockout-Tagout (LOTO) steps to lock the power source. This prevents accidents and keeps your equipment safe.
Tip: Not sure which breaker to turn off? Shut off the main power for your home. It’s better to be extra careful than risk a shock.
Preparing the Installation Site
After turning off the power, get the site ready for your pendant light. Good preparation makes the job easier and avoids surprises. Follow these steps:
-
Safety First: Use your voltage tester again to confirm the power is off.
-
Inspect the Area: Check for damage in the wiring or mounting surface. Fix any issues first.
-
Unpack and Assemble: Open the pendant light box. Make sure all parts are there and follow the instructions to put it together.
-
Check Compatibility: Ensure the power supply matches the pendant light’s needs. This helps it work correctly.
-
Secure the Mounting Surface: Make sure the surface can hold the light’s weight safely.
These steps make installation smoother and ensure your light works safely and properly.
Note: If working outside, keep the area dry and clear of debris. Wet spots can make the job unsafe.
Installing a Ceiling Box (if Necessary)
If there’s no ceiling box, you’ll need to add one. A ceiling box holds the pendant light securely and keeps wires safe. Here’s what to know:
|
Requirement |
Why It’s Important |
|---|---|
|
Compliance with NEC Standards |
NEC rules make sure your setup is safe and legal. |
|
Proper Grounding |
Grounding stops shocks and keeps you safe. |
|
Weight Rating |
Use a box strong enough to hold your pendant light. |
Steps to install the ceiling box:
-
Mark the spot for the box with a pencil.
-
Cut a hole in the ceiling using a drywall saw. Match the hole size to the box.
-
Attach the box to a joist or use a brace bar if no joist is nearby. This keeps the box sturdy.
-
Pull the wires through the box, leaving enough length to connect later.
Pro Tip: Unsure about the box’s weight limit or setup? Read the manual or ask a professional for help.
Mounting the Pendant Light Fixture
It’s time to put up your pendant light. This step makes your outdoor lighting project come alive. Follow these simple tips for a safe and sturdy setup:
-
Take down the old light: If there’s an old fixture, unscrew it gently. Disconnect the wires carefully to avoid damaging the ceiling box or wires.
-
Attach the mounting bracket: Fix the new bracket to the ceiling box. Ensure it’s straight and secure. A steady bracket keeps the light hanging properly.
-
Connect the wires: Match the light’s wires to the ceiling box wires. Use good wire connectors and wrap them with electrical tape for safety.
-
Install the fixture: Line up the light with the bracket and tighten it. Make sure it hangs evenly and doesn’t wobble.
-
Finish up: Add the bulb(s), turn the power back on, and test the light.
Tip: Always check that the bracket is level before tightening. A crooked bracket can make the light hang unevenly.
Connecting the Wiring Safely
Wiring may seem hard, but it’s easy with the right steps. Here’s how to safely connect wires when installing a pendant light:
-
Match the wires: Look at the wire colors—black (hot), white (neutral), and green or bare (ground). Connect each light wire to the matching ceiling box wire.
-
Use wire nuts: Secure the connections with wire nuts. Twist them tightly and wrap them with electrical tape for extra safety.
-
Organize the wires: Push the wires neatly into the ceiling box. This stops them from getting pinched or damaged.
-
Check for tension: Make sure the wires aren’t pulled tight. Loose wires last longer and stay connected.
-
Label if needed: If there are many wires, label them for easy future repairs.
Note: Follow NFPA 70 rules to keep your wiring safe and legal. These rules reduce risks and make your light setup reliable.
Adjusting the Pendant Light Height
The last step is setting the height of your pendant light. This ensures it hangs at the right level for your space.
-
Measure the height: Use a tape measure to find the best height. Keep the light at least 7 feet above the ground. Over tables or seats, aim for 30-36 inches above the surface.
-
Change the chain or cord: Most lights have adjustable chains or cords. Shorten or lengthen them to get the perfect height.
-
Check the height: Step back and see how the light looks from different spots. Make sure it’s not too high or low.
-
Lock it in place: Once you’re happy, secure the chain or cord. Double-check that it won’t slip later.
Pro Tip: Not sure about the height? Start with a longer chain or cord. You can always shorten it, but adding length is harder.
Securing the Fixture in Place
Now that you’ve adjusted the height of your pendant light, it’s time to secure it in place. This step ensures your fixture stays sturdy and safe, even in outdoor conditions. Follow these steps to lock everything down properly.
-
Double-check the mounting bracket: Before you secure the fixture, make sure the mounting bracket is tightly attached to the ceiling box. A loose bracket can cause the light to wobble or fall over time. Use a screwdriver to tighten any screws that feel loose.
-
Align the fixture: Hold the pendant light fixture up to the bracket and align it with the screw holes. This step is crucial for a balanced and professional look. If the fixture feels heavy, ask someone to hold it for you while you work.
-
Secure the screws: Insert the screws through the fixture’s base and into the mounting bracket. Tighten them evenly to keep the light stable. Avoid overtightening, as this can damage the fixture or the bracket.
-
Check for stability: Gently tug on the fixture to ensure it’s firmly in place. It shouldn’t wobble or shift when you touch it. If it does, go back and tighten the screws a bit more.
Tip: If your outdoor pendant light comes with additional hardware, like a canopy or decorative cover, attach it now. These pieces not only enhance the look but also protect the wiring from outdoor elements.
-
Seal for outdoor durability: Outdoor lighting fixtures need extra protection against weather. Apply a small bead of silicone sealant around the base of the fixture where it meets the ceiling. This keeps moisture and dirt out, extending the life of your light.
-
Inspect your work: Step back and take a good look at the fixture. Make sure it’s hanging straight and looks secure. If something seems off, adjust it before moving on to the final testing phase.
Pro Tip: If you’re installing the pendant light in a windy area, consider using additional support, like a safety cable, to keep it steady.
By following these steps, you’ll ensure your pendant lights are not only functional but also safe and durable for your outdoor space. A securely installed fixture means you can enjoy your lighting worry-free, whether it’s a calm evening or a stormy night.
Testing and Final Adjustments After Installation
Testing the Light for Proper Functionality
After installing your outdoor pendant lights, test them to ensure they work. Turn the circuit breaker back on and flip the light switch. If the light doesn’t turn on, check the wiring connections. Loose or wrong connections can stop the light from working.
Use a voltage tester to see if electricity is reaching the fixture. This tool helps find power issues. If the light flickers or dims, check the bulb and replace it if needed.
Tip: Not sure how to fix electrical problems? Call a licensed electrician. They’ll make sure everything is safe and correct.
Testing isn’t just about checking if the light works. It’s also about making sure the brightness fits your outdoor space. Step back and see how the light shines. Change the bulb wattage or move the fixture if needed for the best effect.
Aligning and Adjusting the Fixture
Making sure your pendant lights hang straight is important for looks and lighting. Use a level to check if the fixture is even. Adjust it if it’s not straight.
Follow these simple steps for proper alignment:
-
Mark where the fixture will go with a pencil.
-
Drill holes at the marks and add anchors for support.
-
Line up the fixture with the marks and secure it tightly.
-
Turn the power on to test the light and adjust its angle.
-
Look at the fixture from different sides to make sure it’s balanced.
Pro Tip: Tilt the fixture slightly to highlight areas like a table or path. This makes your outdoor lighting look more polished.
Ensuring Secure Connections
Safe wiring is very important for your pendant lights to work well. Check that all wires are connected tightly and covered properly. Loose wires can cause power problems or even fires.
Here’s how to make sure connections are secure:
-
Match the wires correctly—black to black, white to white, and green or bare to ground.
-
Use wire nuts to hold the wires together and wrap them with tape for safety.
-
Tuck the wires neatly into the ceiling box to avoid damage.
-
Look for any signs of wear or mistakes in the wiring.
Note: Not confident about wiring? Hire a licensed electrician. They’ll follow local rules and keep your setup safe.
By following these steps, your outdoor lighting will be safe and work well. Testing, aligning, and securing connections will help your pendant lights shine brightly for years.
Putting up outdoor pendant lighting can be simple. You now know how to get ready, pick the best light, and follow steps to install it safely. Being careful and prepared helps you succeed.
Taking care of your outdoor lights is important. Check for damage after bad weather. Clean the fixture and look at the wires often to keep it working well. LED lights last a long time, but regular checks can make them last even longer. This keeps your outdoor space bright and welcoming for years.
Tip: Use a checklist to make inspections easier and help your lights stay strong.
FAQ
How do I know if my outdoor pendant light is weatherproof?
Check the light’s IP rating. Look for a rating of 44 or higher to ensure it’s protected against water and dust. You’ll find this information on the packaging or product description.
Tip: Choose materials like aluminum or coated steel for extra durability in harsh weather.
Can I install outdoor pendant lighting without a ceiling box?
No, you need a ceiling box to secure the fixture and protect the wiring. If your space doesn’t have one, install it first. It’s essential for safety and compliance with electrical standards.
Note: Use a brace bar if there’s no joist nearby to support the box.
What’s the best height to hang an outdoor pendant light?
Hang the light at least 7 feet above the ground for general areas. Over tables or seating, keep it 30-36 inches above the surface. This ensures proper lighting and avoids obstruction.
Pro Tip: Adjustable fixtures let you tweak the height for different spaces.
Can I use LED bulbs in my outdoor pendant lights?
Yes, LED bulbs are a great choice. They last longer, use less energy, and work well in outdoor conditions. Make sure the bulb fits the fixture’s specifications.
Emoji Tip: 🌟 LEDs save money and shine brighter!
What should I do if my pendant light doesn’t turn on after installation?
Double-check the wiring connections. Use a voltage tester to ensure electricity is flowing to the fixture. If the problem persists, inspect the bulb or call a licensed electrician for help.
Alert: Safety first! Always turn off the power before troubleshooting.